

Products Tested In-House


How to Install LED Strips Around Corners: A Complete Guide
Installing LED strips around corners and sharp angles can present challenges. Without the right approach, issues like light gaps, voltage drop, or circuit strain can affect performance and longevity.
While corner connectors provide a structured solution for 90-degree transitions, they’re not always the only option. Alternative methods, such as S-bend installations or routing LED strips inside a profile, can help maintain uninterrupted illumination and greater flexibility.
This guide covers the best installation methods for LED strips around corners, how to ensure seamless lighting, key best practices, and common mistakes to avoid.

Choosing the Right Approach for Corner Installations
Not all LED strips are designed to bend in the same way, and improper handling can lead to damage. Before deciding on a corner installation method, consider the following:
Bendability of your LED strip – Most standard LED strips are designed to bend vertically (up and down) but not horizontally (side to side). If you attempt to force a horizontal bend, you risk breaking solder joints or causing inconsistent lighting.
Alternative solutions to connectors – Instead of relying on corner connectors, S-bend installations allow the strip to fold within the profile while maintaining continuous illumination. This method is ideal for shallow-profile installations where light output consistency is key.
Avoiding dead spots – Colour-changing LED strips often create a dead spot when bent at sharp angles. To maintain uniform lighting, using an S-bend or a dedicated colour-changing corner connector is recommended.
When to use corner connectors – If S-bends are not an option, corner connectors provide a structured transition, particularly for sharp 90-degree angles. However, these are best suited for ceiling features or sky lighting applications rather than architectural integrations.
Outdoor & wet area considerations – Standard corner connectors and IP-rated LED tape are not ideal for long-term outdoor exposure. For external projects requiring flexibility, Neon Flex LED solutions offer both vertical and horizontal bending while maintaining weather resistance.

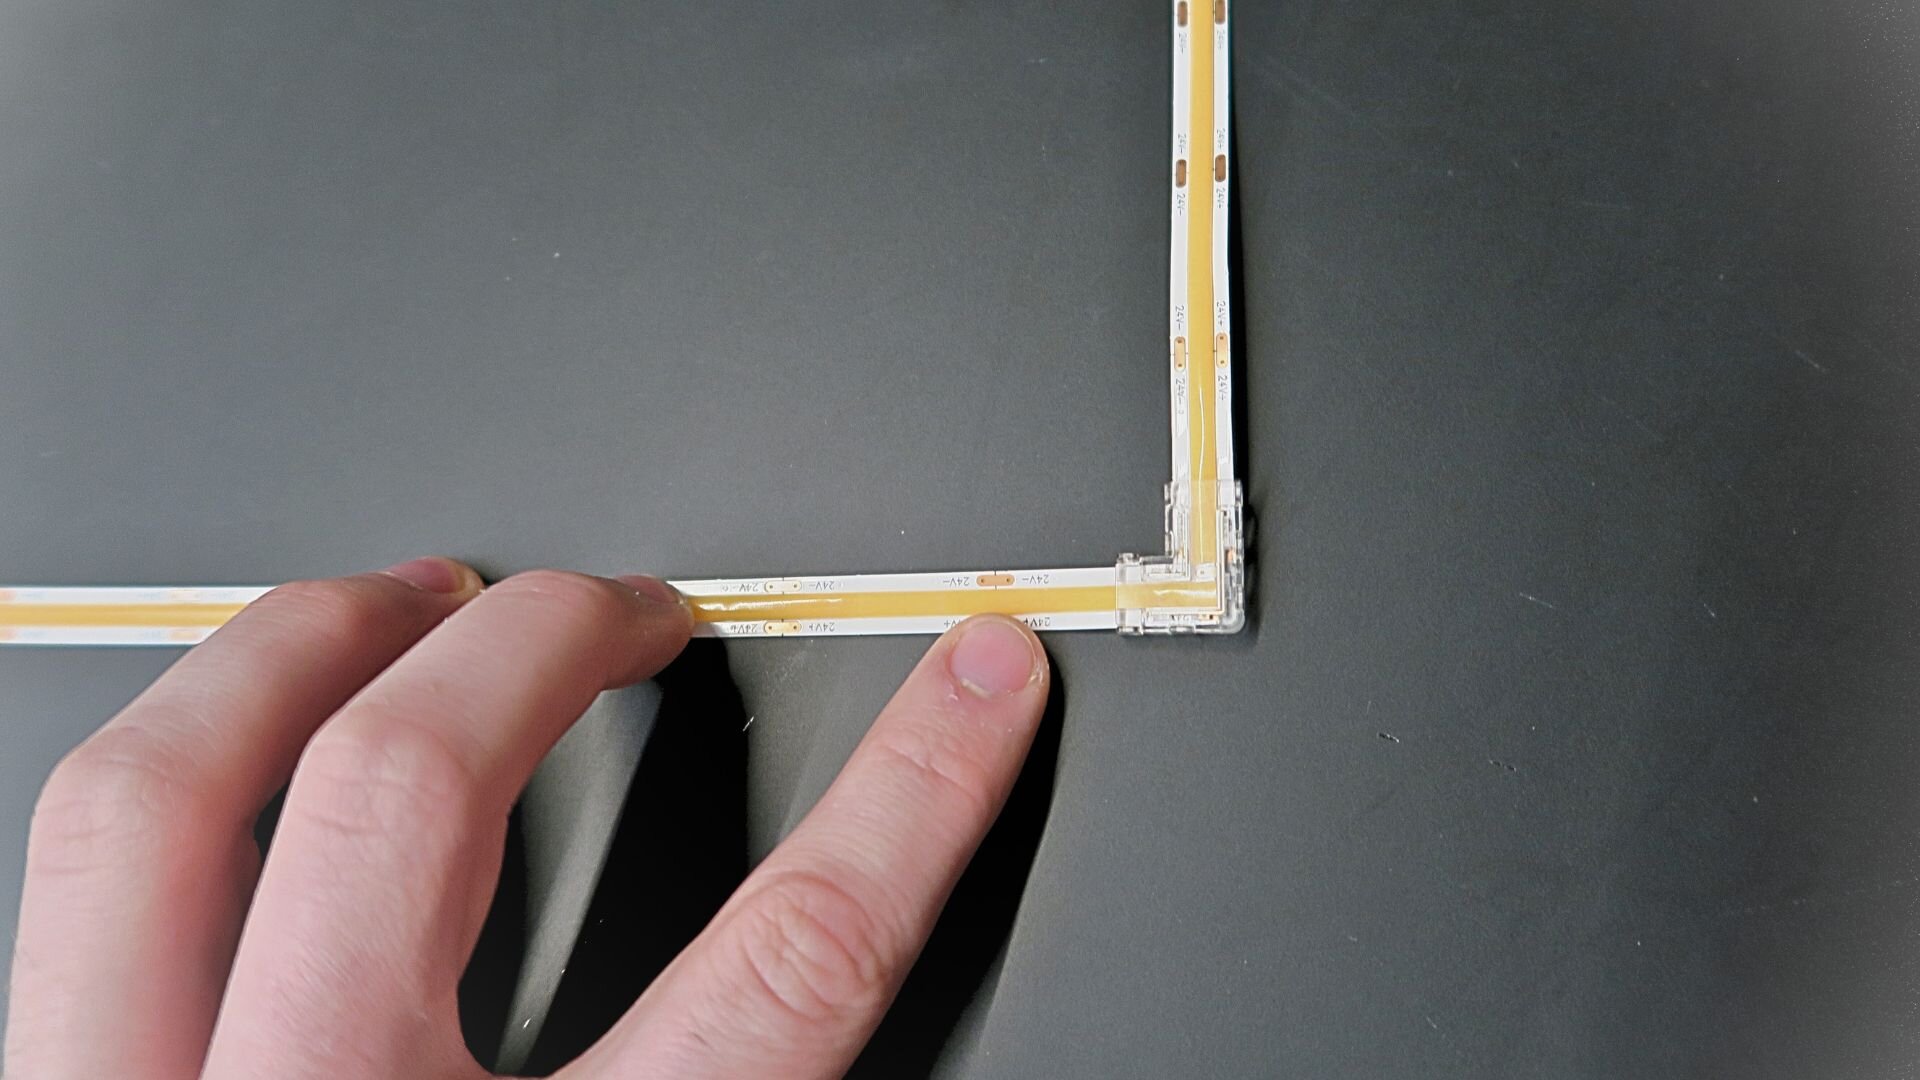
What Are Corner Connectors?
LED corner connectors are structured solutions designed for 90-degree transitions where LED strips cannot be routed through an S-bend or inside a profile.
Many online guides suggest folding LED strips, but this method compromises PCB integrity and creates uneven lighting. Instead, corner connectors offer a secure electrical connection, preventing damage to solder joints.
However, they are not always necessary. If space allows, an S-bend installation or routing the LED strip within the profile can eliminate the need for connectors altogether, ensuring a seamless look without light gaps.

Types Of LED Connectors
A range of corner connectors are available, each designed for specific installation needs. The right choice depends on angle requirements, LED strip type, and the installation environment.
L-Shaped Corner Connectors (90-Degree Angles)
Designed for sharp 90-degree transitions, ensuring a clean and structured lighting layout.
Best for: Shallow profiles, ceiling features, and skylights.
Key Benefit: Maintains electrical continuity without creating visible light gaps.
Solderless IP Corner Connectors
A quick-install alternative to soldering, available in different formats such as buckle connectors and pin connectors.
Best for: Secure, tool-free installations for cabinetry, shelving, display lighting, and custom-built interiors.
Key Benefit: Provides a strong and reliable connection without the need for specialist tools. Some versions use buckles, while others pierce the tape for added stability.
L-Shaped Corner Connectors for Colour-Changing LEDs
Designed for RGB and dynamic lighting setups to maintain consistent colour output.
Best for: RGB installations where avoiding colour distortion at corners is essential.
Key Benefit: Ensures even colour distribution by preventing dead spots in corners.
How To Install Corner Connectors
Correct installation ensures a secure connection, prevents flickering, and maintains long-term reliability.
- Match the Connector to the LED Strip Width – Ensure compatibility with the LED tape's width (e.g., 8mm, 10mm, 12mm).
- Ensure Proper Alignment – Misalignment can result in weak connections or intermittent flickering.
- Use Grips to Secure Pins – While solderless connectors are a DIY-friendly solution, gently pressing down the connector pins ensures a firm grip on the PCB contacts.
- Test Before Final Installation – Before permanently fixing the connector in place, ensure all sections are illuminated correctly.
Common Mistakes To Avoid
- Forcing a Horizontal Bend on Standard LED Strips – Standard LED strips are designed to bend vertically, not sideways. For lateral bending, use LED Neon Flex or a corner joint.
- Folding LED Strips Instead of Using a Connector – Bending an LED strip at too sharp of an angle can damage the PCB.
- Loose Connections – Poorly seated connectors can cause flickering or overheating, reducing LED lifespan.
- Overtightening the Strip in Profiles – Allow slack in corners to prevent stress on the PCB, especially with COB LED tape, which can become brittle if overbent.

Technical Considerations For Corner Installations
- Soldering vs. Solderless Connectors – Solderless connectors are a tool-free alternative, but using grips to secure the pins ensures a stable connection.
- Outdoor Installations – If a project requires weatherproofing, consider LED Neon Flex instead of standard LED tape with corner connectors.
- Profiles & Diffusers – These are not just for aesthetics; they protect the LED strip and help with heat dissipation, extending lifespan.

FAQs
Do all LED strips require connectors for corner installations?
Most LED strips bend in one direction (vertically) but won’t bend side to side. While some professional-grade LED strips are designed for multi-directional flexibility, most require a corner joint or an S-bend installation to maintain a clean, seamless look.
Can I solder LED strips at corners instead of using connectors?
Yes, but soldering requires technical expertise. Solderless connectors are a great DIY alternative for quick and easy installation.
How do I ensure a secure installation when using corner connectors?
- Ensure the connector is fully closed, and pins are pressed down properly.
- Mount in an aluminium profile to prevent movement after installation.
- Test connections before permanently securing the LED strips. Many installers plaster over connections without testing, leading to failures that require rework.
Ready to find the right solution for your next installation? Browse our corner connectors for seamless corner installations, or explore our LED strip lighting solutions to complete your setup.
Get in touch with Ultra LEDs today
Whether you're working on commercial installs, bespoke lighting projects, or integrating LED strips into architectural designs, our team can help you find the right solution for a seamless finish.
Keep Up To Date
Don’t miss out on any fantastic offers or important news by subscribing to our FREE Exclusive Newsletter.
Your data will be held in accordance with our privacy policy which can be found here.
You will receive an email to confirm your subscription.