Trade Members Get 10% Off. Sign Up Today
WT5 5-in-1 Wireless Receiver: Setup Guide
The WT5 5-in-1 Smart Wireless Receiver is a versatile LED receiver designed for professional lighting installations requiring multi-zone control and compatibility across a wide range of LED strip types, including Single Colour, CCT, RGB, RGBW and RGBCCT.
Offering smart control options, the WT5 supports app integration, voice assistant compatibility (Amazon Alexa and Google Assistant), and pairing with wall plates or handheld remotes.
This guide outlines the steps for configuring each output mode, assigning receivers to zones, and matching control hardware.
Below, you’ll find setup guides for each WT5 receiver and controller pairing — covering all compatible modes and installation types:
- Single Colour Guide
- CCT Guide
- RGBW Guide
- RGBW Remote & Wall Plate Guide
- RGBCCT Remote & Wall Plate Guide
For a quick look at how to pair the WT5 Wireless Receiver, you can watch our setup video here.
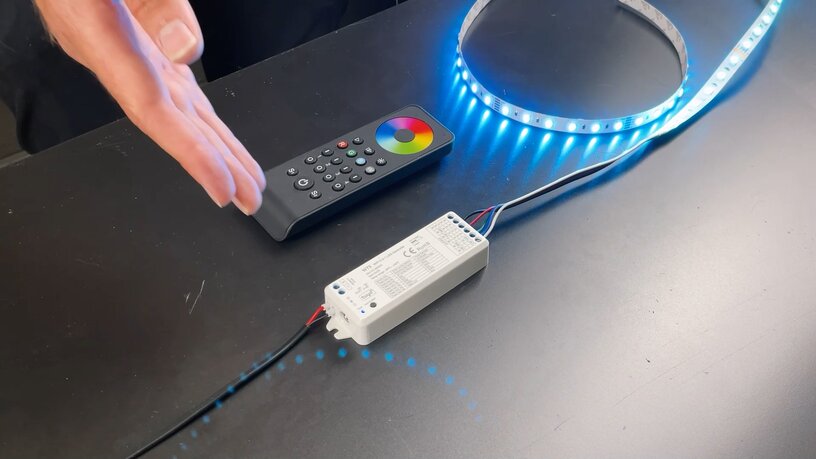
WT5 Quick Match Guide - Single Colour
Power up the Single Colour WT5 5-in-1 Wireless Receiver and wait until the indicator light next to the Match and Set button stops flashing and displays a static colour.
Refer to the mode guide printed on the WT5 to ensure the receiver is in the correct mode. For DIM (Single Colour) mode, the indicator light should display a static white.
If the indicator colour does not match your LED tape type, follow the steps below to change the mode.
1. Set to DIM Mode
Press and hold the Match and Set button. The indicator light will cycle through a series of colours: first turning off, then showing a purple-white, followed by a soft white.
As soon as it reaches the light white colour, release the button. The LEDs will flash to confirm the mode change.
Press the Match and Set button once more to set the mode. You should now see a static white light on the indicator.
If the receiver is already in the correct mode, you can skip this step.
2. Pair Your Remote or Wall Plate
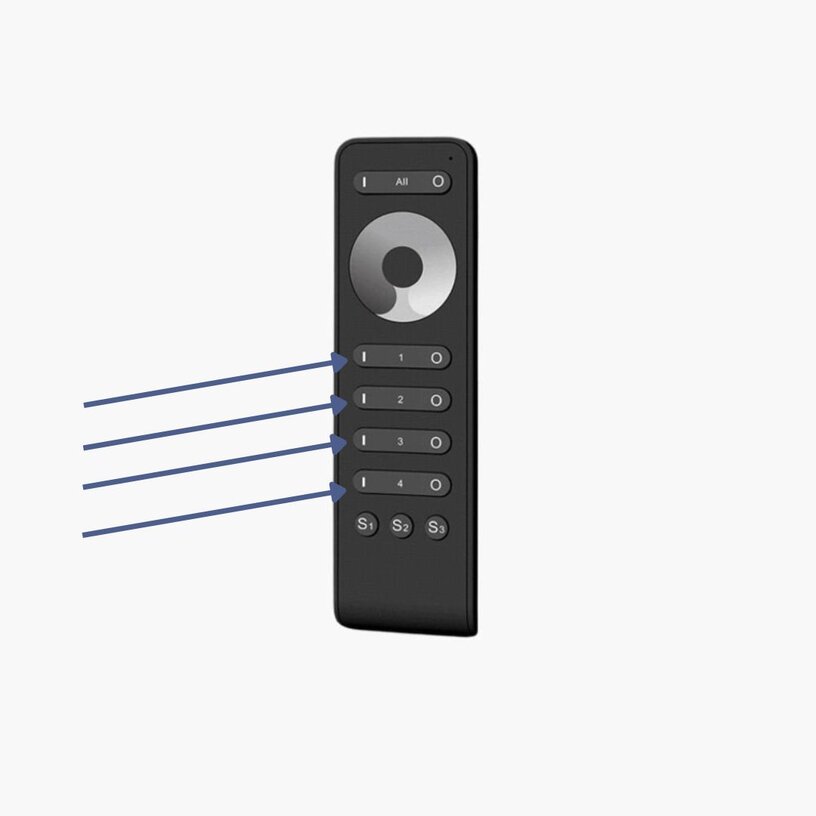
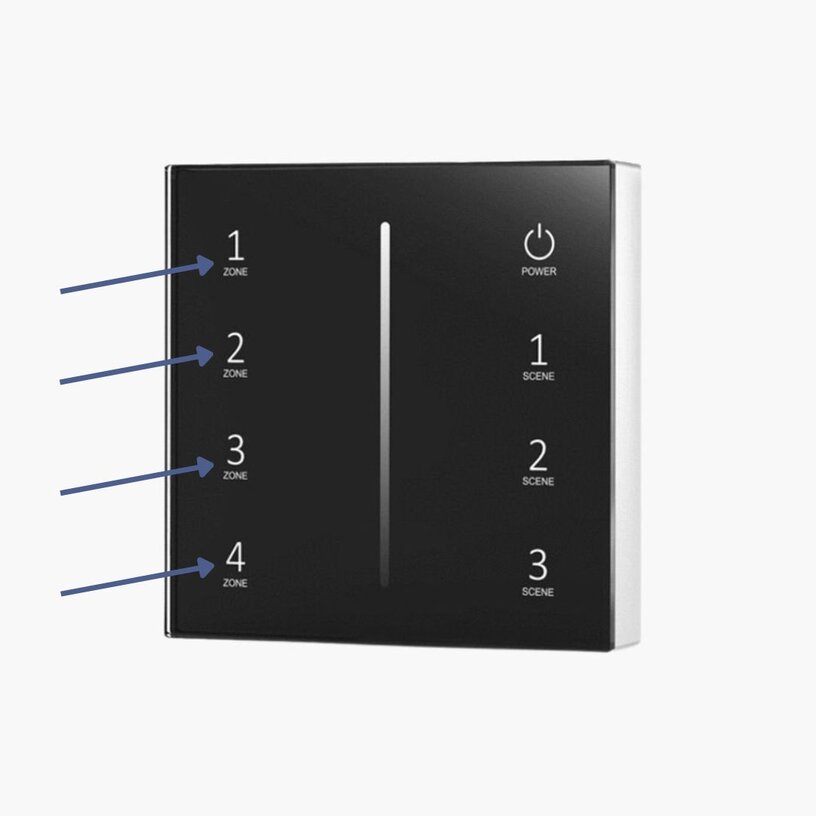
Choose the zone you want to assign the receiver to.
Press the Match and Set button on the receiver, then immediately double-click the corresponding zone button on the remote or wall plate.
3. Confirm Pairing
Once paired, the WT5’s indicator light will blink three times.
To test, slide your finger along the dimming wheel or slider — you should now have full control.
4. Multiple Zones or Receivers
To pair additional receivers to different zones, repeat the matching process using a different zone button each time.
If you have multiple receivers in the same area and want them all controlled together, assign them to the same zone.
Press the Match and Set button on each receiver and double-click the same zone button on the remote or wall plate.
5. Unpair a Receiver
If a receiver is matched to the wrong zone, press and hold the Match and Set button.
Hold it until the indicator cycles through all colours, returns to white, and blinks three times — this confirms the receiver is unpaired.
To reassign, follow the pairing steps again.
How To Pair The WT5 Wireless Receiver
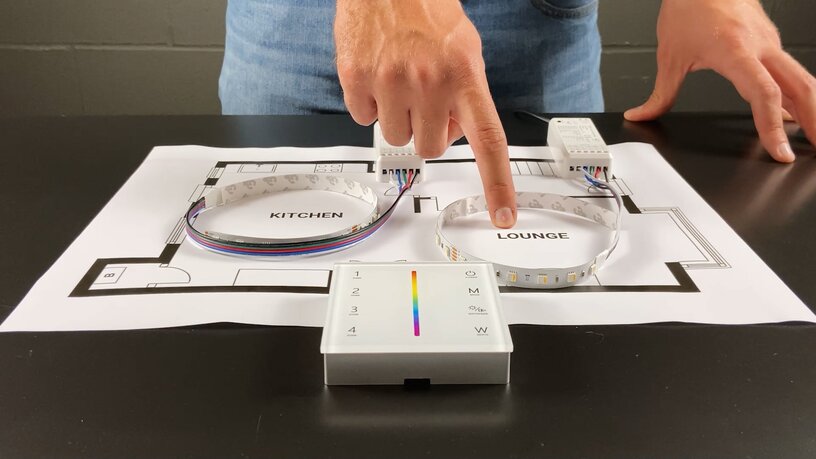
Want a visual walkthrough of how to pair the WT5 Wireless Receiver?Watch our technical engineer demonstrate the process in the video below.
WT5 Quick Match Guide – CCT
Power up the CCT WT5 5-in-1 Wireless Receiver and wait until the light next to the Match and Set button stops flashing and displays a static colour.
Refer to the printed mode guide on the WT5 to confirm that the receiver is in the correct mode. For CCT mode, the indicator light should display a static yellow.
If the indicator colour does not match the LED tape type you're using, follow the steps below to switch modes.
1. Set the Receiver to CCT Mode
Press and hold the Match and Set button. The indicator light will begin cycling through a series of colours — first turning off, then showing a purple-white, followed by a light white, and then finally yellow.
As soon as the light reaches yellow, release the button. The LEDs will flash briefly. Press the Match and Set button once to confirm the mode.
You should now see a static yellow light on the receiver.
If your receiver is already set to this mode, you can skip this step.
2. Match the Receiver to a Zone
Choose which zone you want to assign the receiver to.
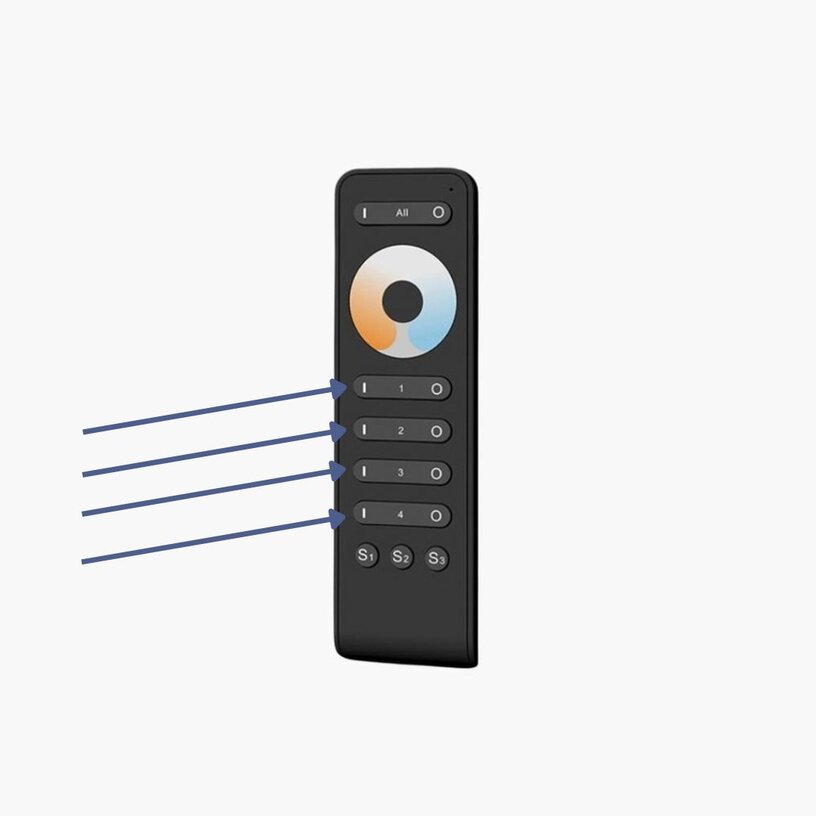
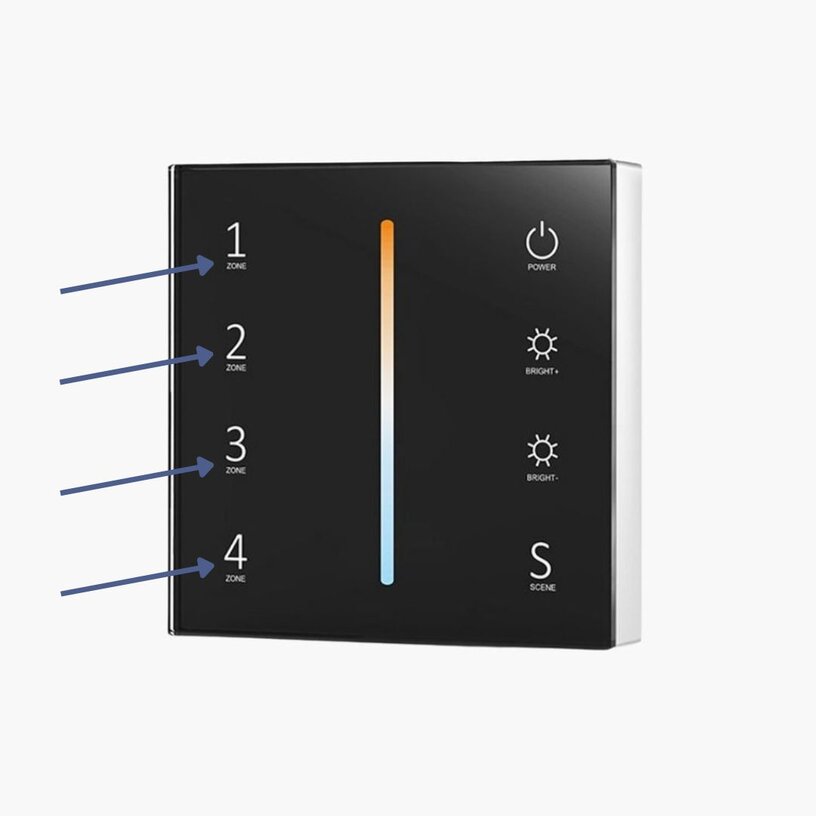
Press the Match and Set button on the receiver, then immediately double-click the corresponding zone button on your remote or wall plate.
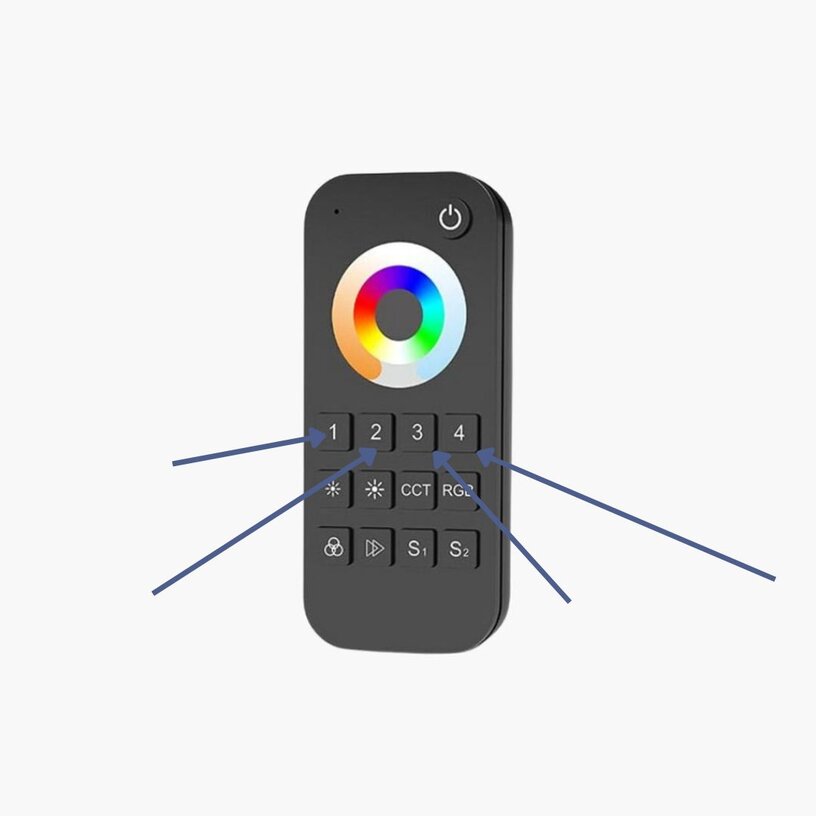
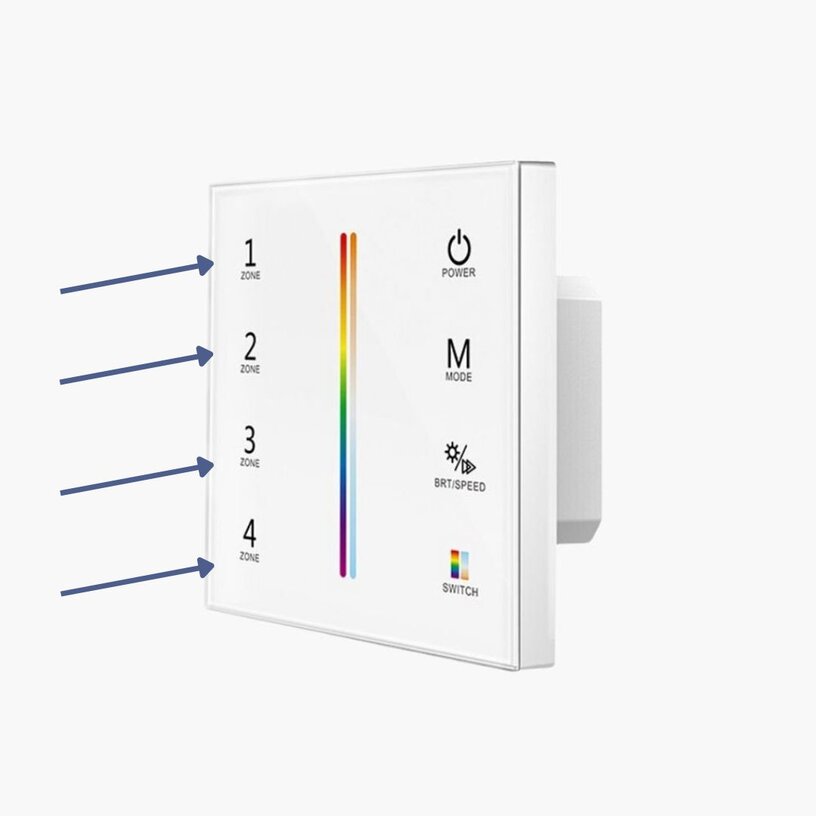
Refer to the diagrams — arrows indicate each zone on the controller.
3. Confirm Successful Pairing
After double-clicking the zone button, the WT5 indicator light will blink three times to confirm pairing.
You can now test control by adjusting the dim slider or wheel on your remote. You should have full access to the CCT settings.
4. Match Multiple Zones or Receivers
To assign additional receivers to different zones, repeat the matching steps using a different zone button each time.
If multiple receivers are installed in the same area and should be controlled together, match all of them to the same zone. For example:
Match receiver 1 to zone 1
Then match receiver 2 to zone 1
Continue for any additional receivers
5. Unpair a Receiver
If you need to unpair a receiver, press and hold the Match and Set button. Hold it until the light cycles through all colours, returns to white, and flashes three times — this confirms the receiver is unpaired.
To reassign it to the correct zone, repeat the pairing steps above.
WT5 Quick Match Guide – RGB
Power up the RGB WT5 5-in-1 Wireless Receiver and wait until the light next to the Match and Set button stops flashing and displays a static colour.
Refer to the mode guide printed on the WT5 to ensure the receiver is in the correct mode. For RGB mode, the light should display a static red.
If the colour does not match the type of LED tape you're using, follow the steps below to switch modes.
1. Set the receiver to RGB mode
Press and hold the Match and Set button. The light will cycle through the following colours: off, purple-white, light white, yellow, then red.
As soon as it reaches red, release the button. The LEDs will flash. Press the Match and Set button once to confirm the mode.
You should now see a static red light on the indicator.
If the receiver is already in the correct mode, skip this step.
2. Match the receiver to a zone
Choose which zone you want to assign the receiver to.
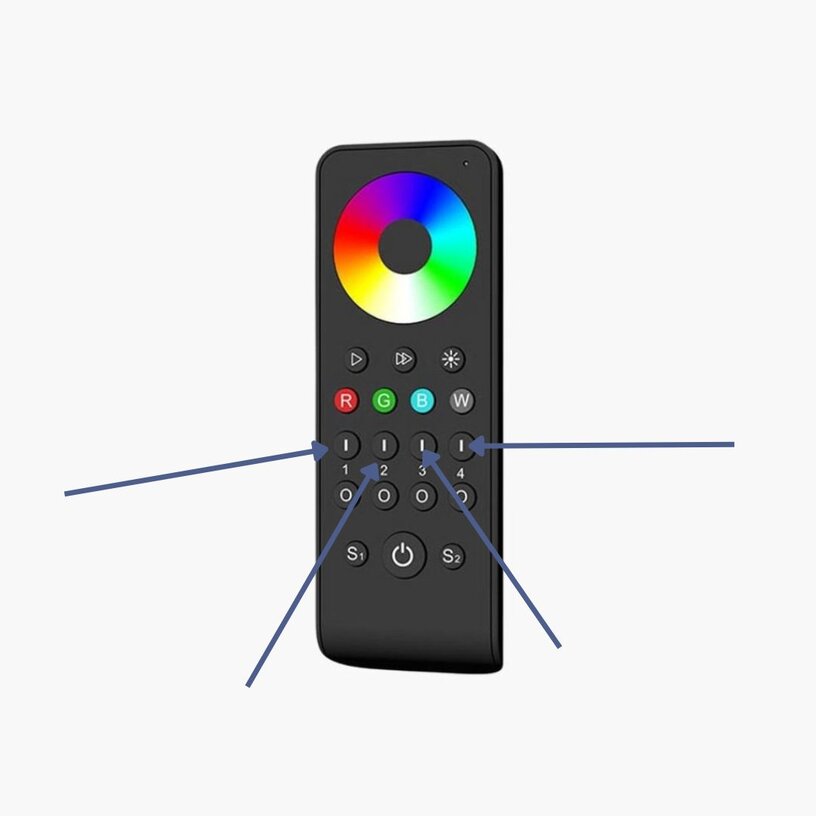
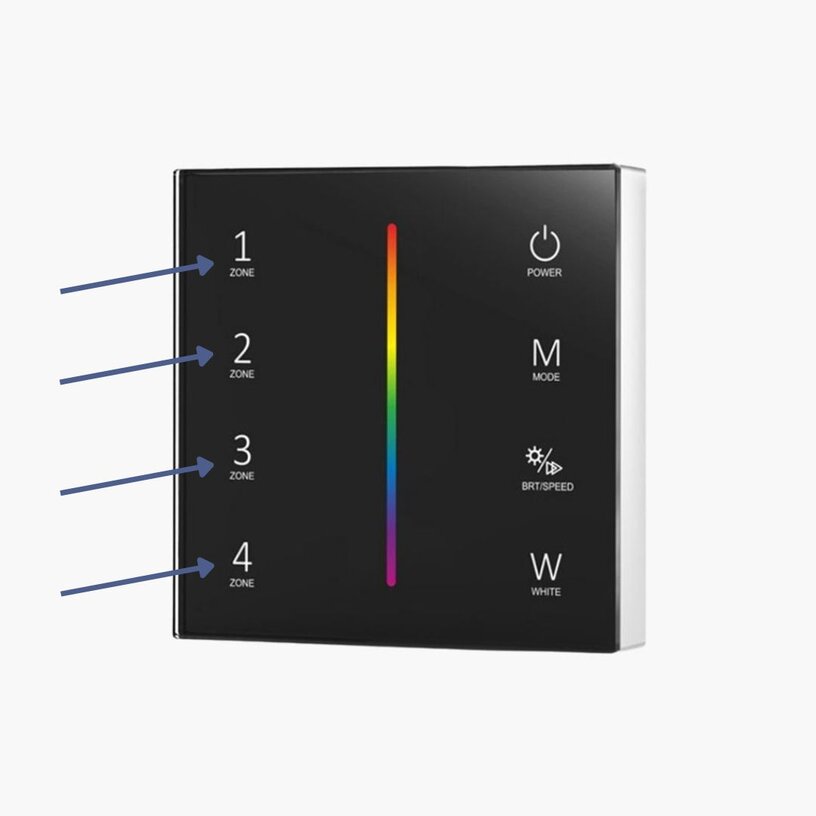
Press the Match and Set button on the receiver, then immediately double-click the corresponding zone button on your remote or wall plate.
Refer to the diagrams for zone button locations.
3. Confirm pairing
Once you’ve double-clicked the zone button, the light on the WT5 will blink three times to confirm successful pairing.
To test control, run your finger along the dim slider or wheel.
4. Assign multiple zones or receivers
To assign additional receivers to different zones, repeat the matching steps and select a different zone button each time.
If multiple receivers are being used in the same space and need to be controlled together, match them all to the same zone by repeating the process with the same zone button.
5. Unmatch a receiver
To unpair a receiver, press and hold the Match and Set button.
Hold it until the light cycles through all the colours, returns to white, and flashes three times. This means the receiver has been unpaired.
To match it to a new zone, repeat the steps above.
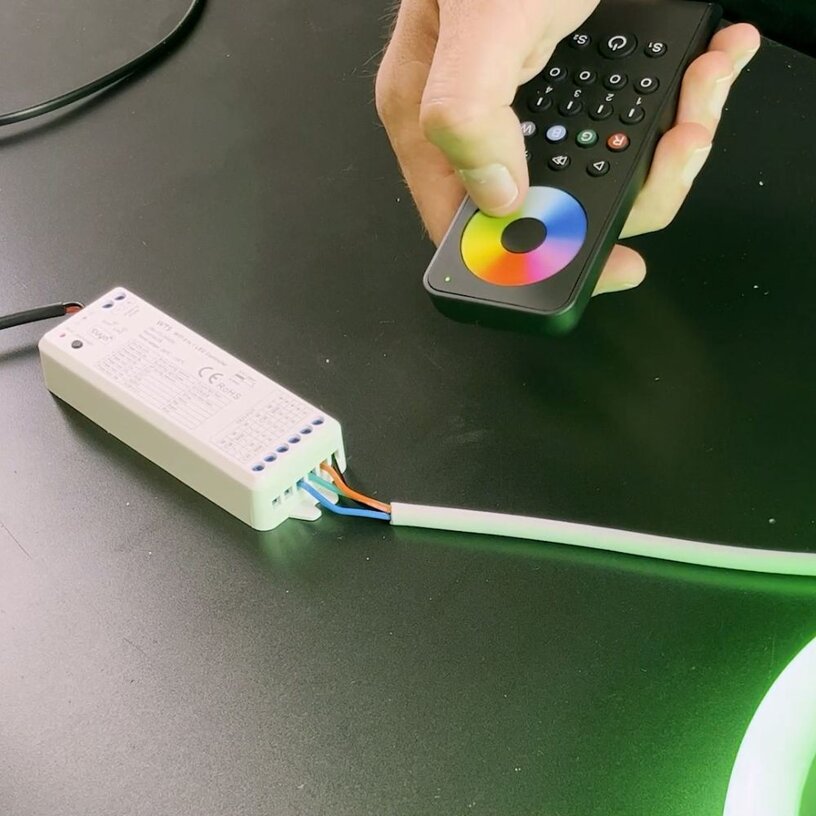
WT5 Quick Match Guide – RGBW remote & wall plate
Power up the RGBW WT5 5-in-1 Wireless Receiver and wait until the light next to the Match and Set button stops flashing and displays a static colour.
Refer to the mode guide printed on top of the WT5 to confirm the receiver is in the correct mode. For RGBW mode, the light should display a static green.
If the colour does not correspond to the type of LED tape being used, follow these steps to switch modes:
1. Set the receiver to RGBW mode
Press and hold the Match and Set button.
The light will cycle through the following colours: off, purple-white, light white, yellow, red, then green.
When the light reaches green, release the button. The LEDs will flash. Press the Match and Set button once to confirm the mode.
You should now see a static green light on the indicator. If your receiver is already in RGBW mode, skip this step.
2. Assign the receiver to a zone
Decide which zone to assign the receiver to.
Press the Match and Set button on the receiver, then immediately double-click the corresponding zone button on your remote or wall plate.
Zone indicators are shown in the diagrams below.


3. Confirm successful pairing
After double-clicking the zone button, the light on the WT5 will blink three times to confirm pairing.
Test control by using the dim slider or wheel on your remote or wall plate.
4. Assign multiple zones or receivers
To assign receivers to different zones, repeat the matching process and select a new zone each time.
If multiple receivers are used in the same room and should be controlled together, assign them all to the same zone by repeating the matching process using the same zone button.
5. Un-match a receiver
To unpair a receiver, press and hold the Match and Set button.
Hold it until the light cycles through all the colours, returns to white, and flashes three times. This confirms the receiver has been un-matched.
To reassign, repeat the steps above.
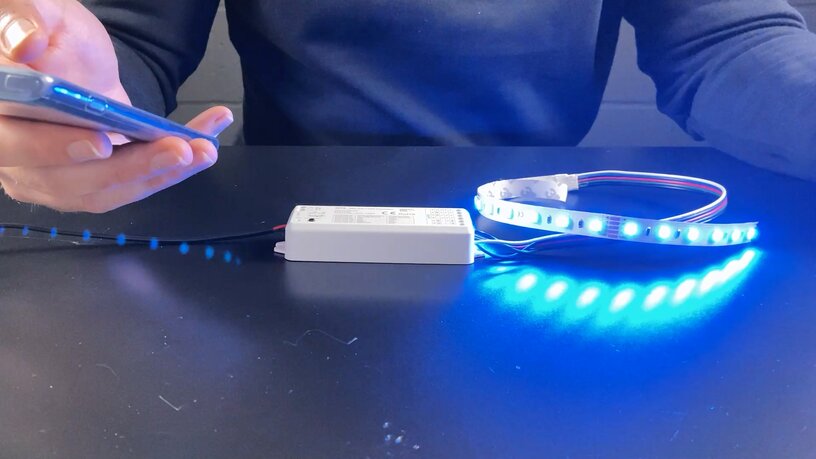
WT5 Quick Match Guide – RGBCCT remote & wall plate
Power up the RGBCCT WT5 5-in-1 Wireless Receiver and wait until the light next to the Match and Set button stops flashing and displays a static colour.
Refer to the mode guide printed on top of the WT5 to confirm the receiver is in the correct mode. For RGBCCT mode, the light should display a static blue.
If the colour does not correspond to the type of LED tape being used, follow these steps to switch modes:
1. Set the receiver to RGBCCT mode
Press and hold the Match and Set button.
The light will cycle through the following colours: off, purple-white, light white, yellow, red, green, then blue.
When the light reaches blue, release the button. The LEDs will flash. Press the Match and Set button once to confirm the mode.
You should now see a static blue light on the indicator. If your receiver is already in RGBCCT mode, skip this step.
2. Assign the receiver to a zone
Decide which zone to assign the receiver to.
Press the Match and Set button on the receiver, then immediately double-click the corresponding zone button on your remote or wall plate.
Zone indicators are shown in the diagrams below.
3. Confirm successful pairing
After double-clicking the zone button, the light on the WT5 will blink three times to confirm pairing.
Test control by using the dim slider or wheel on your remote or wall plate.
4. Assign multiple zones or receivers
To assign receivers to different zones, repeat the matching process and select a new zone each time.
If multiple receivers are used in the same room and should be controlled together, assign them all to the same zone by repeating the matching process using the same zone button.
5. Un-match a receiver
To unpair a receiver, press and hold the Match and Set button.
Hold it until the light cycles through all the colours, returns to white, and flashes three times. This confirms the receiver has been un-matched.
To reassign, repeat the steps above.
Get in touch with Ultra LEDs today
Ready to start installing the WT5 Smart Home Controller?
If you're working on residential, smart home or multi-zone LED setups, this controller is built to handle it. Contact Ultra LEDs to specify the right configuration for your project.
Author: Tom Cain, Technical Manager @ Ultra LEDs
Tom supports product development and technical integration across Ultra LEDs’ control systems. With hands-on experience specifying drivers and controllers for architectural and residential installs, he advises on compatibility, layout planning and control logic.
For WT5 projects, Tom works closely with installers to ensure control modes align with LED tape types, and that systems are set up to run reliably across app, remote and wall panel interfaces.


